ASP.NET Core 8 Minimal API 搭配 Vue SPA
ASP.NET Core 8 Minimal API 搭配 Vue
前言
本篇文章是基於建立一個本地端的應用程式的情境,
用 Minimal API 搭配 Vue 可以輕鬆建構類單機應用,
透過設定把靜態檔案嵌入並發佈單一檔案,
就可以讓前端工程師專注在畫面的設計,
算是個不錯的解決方案。
關於桌面應用
開發桌面或跨平台應用有許多技術,
例如 QT、Winform、WPF、UWP、Electron。
但上述都有一些小缺點,
例如 Winform 無法跨平台,
QT 學習成本不低等等的。
關於 Minimal API
過去的 Web API 範本比較多是基於 MVC 的架構基礎上,
然而在這個微服務和隕石開發當道渾沌的時代,
Minimal API 省去一些舊有的配置變得更加精簡。
許多知名的 Web API 框架也是這樣的設計,
例如 Go 的 Gin Web Framework。
關於搭配前端框架
在傳統 ASP.NET 的 MVC 架構中,
畫面渲染主要是用 Razor 引擎。
如果今天希望換成用前端框架做 SPA 呢?
雖然 Visual Studio 中也有 SPA 的範本,
不過那一大包看起來可是滿嚇人的。
而且建置後問題也是不少......
如果今天一個場景是希望使用前端框架作網站,
那麼常見的作法是用前後分離,
然後前端呼叫後端的 API 端點來取用資源。
實作目標
- 前端專案可獲取後端範本的天氣資料
實作步驟
- 建置 Minimal API 專案
- 建置 Vue 3 專案
- 將前端專案打包後嵌入 Minimal API 專案
建置專案
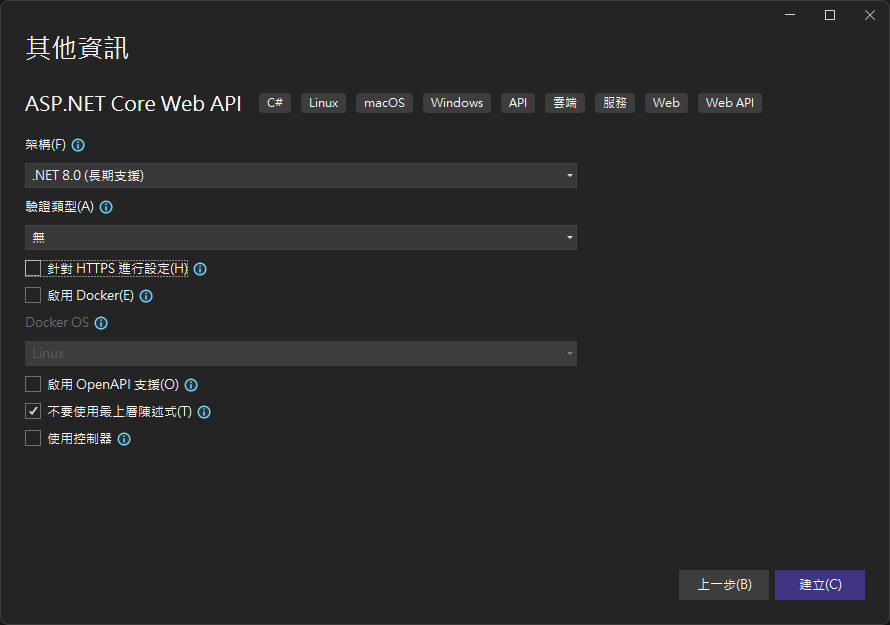
建置 Minimal API 專案
一個 Minimal API 專案最簡單的方式為建立一個 Web API 範本,
然後把使用控制器取消勾選。
本文就以 MinimalApiVue 為專案名稱
進入專案後,最直觀的差異就是路由直接變成下方這樣。
namespace MinimalApiVue
{
    public class Program
    {
        public static void Main(string[] args)
        {
            var builder = WebApplication.CreateBuilder(args);

            // Add services to the container.
            builder.Services.AddAuthorization();


            var app = builder.Build();

            // Configure the HTTP request pipeline.

            app.UseAuthorization();

            var summaries = new[]
            {
                "Freezing", "Bracing", "Chilly", "Cool", "Mild", "Warm", "Balmy", "Hot", "Sweltering", "Scorching"
            };

            app.MapGet("/weatherforecast", (HttpContext httpContext) =>
            {
                var forecast = Enumerable.Range(1, 5).Select(index =>
                    new WeatherForecast
                    {
                        Date = DateOnly.FromDateTime(DateTime.Now.AddDays(index)),
                        TemperatureC = Random.Shared.Next(-20, 55),
                        Summary = summaries[Random.Shared.Next(summaries.Length)]
                    })
                    .ToArray();
                return forecast;
            });

            app.Run();
        }
    }
}
調整路由程式片段
為了不要讓路由在 Program.cs 又臭又長,我們先把它搬到其他地方。
新增一個物件 ApiRoute.cs 並把程式片段複製進去。
namespace MinimalApiVue
{
    public static class ApiRoute
    {
        /// <summary>
        /// 應用程式路由表
        /// </summary>
        /// <param name="app"> WebApplication 實體物件 </param>
        public static void UseApiRoute(this WebApplication app)
        {
            app.MapGet("/weatherforecast", (HttpContext httpContext) =>
            {
                var summaries = new[] { "Freezing", "Bracing", "Chilly", "Cool", "Mild", "Warm", "Balmy", "Hot", "Sweltering", "Scorching" };
                var forecast = Enumerable.Range(1, 5).Select(index =>
                    new WeatherForecast
                    {
                        Date = DateOnly.FromDateTime(DateTime.Now.AddDays(index)),
                        TemperatureC = Random.Shared.Next(-20, 55),
                        Summary = summaries[Random.Shared.Next(summaries.Length)]
                    })
                    .ToArray();
                return forecast;
            });
        }
    }
}
接著調整 Program.cs 將 app.UseApiRoute(); 加入取代剛剛的路由片段。
namespace MinimalApiVue
{
    public class Program
    {
        public static void Main(string[] args)
        {
            var builder = WebApplication.CreateBuilder(args);

            // Add services to the container.
            builder.Services.AddAuthorization();

            var app = builder.Build();

            // Configure the HTTP request pipeline.
            app.UseAuthorization();

            // 使用路由表
            app.UseApiRoute();

            app.Run();
        }
    }
}
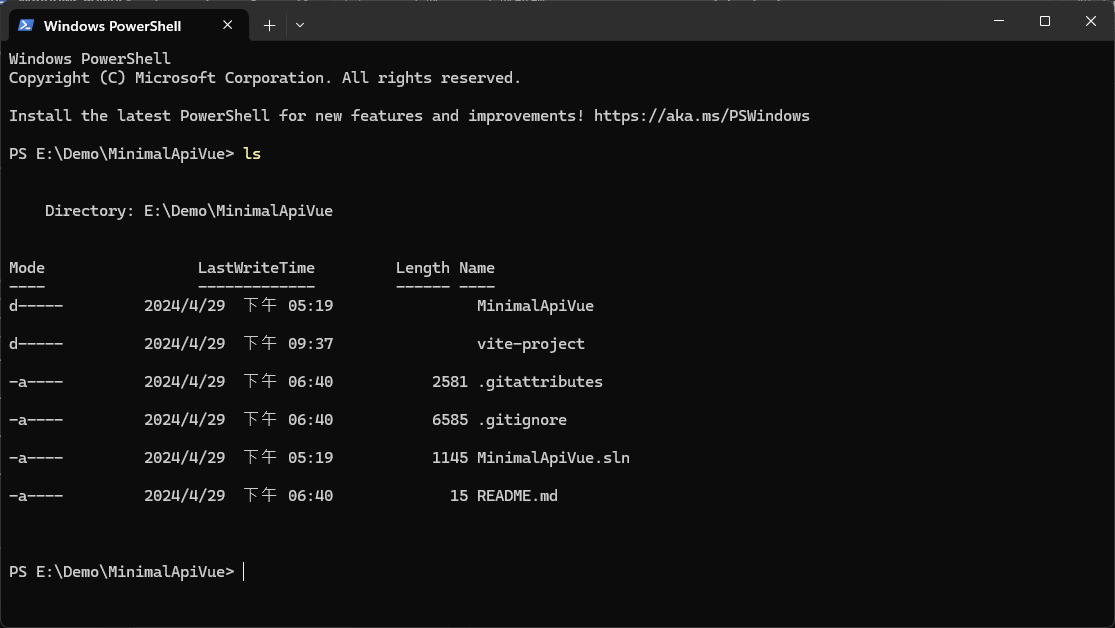
建置 Vue 3 專案
接下來在 Minimal API 專案外面建立一個 Vue 3 專案
這邊用 Vite 來建立專案,步驟可參考 建置教學參考
專案名稱就用預設的 vite-project
後端專案修改
調整通訊埠號
在 appsettings.json 內加入 "Urls": "https://localhost:8888"
{
    "Urls": "https://localhost:8888",
    "Logging":
    {
        "LogLevel":
        {
            "Default": "Information",
            "Microsoft.AspNetCore": "Warning"
        }
    },
    "AllowedHosts": "*"
}
Visual Studio 會自動加入憑證,沒有的話可以改用 http
指定通訊埠號是為了方便後續前端專案呼叫與建置。
允許 CORS
由於開發階段時期前後端專案會在不同的通訊埠號各自執行,
為了避免 CORS (跨來源資源共用) 問題,
這邊需要先加上一些程式。
namespace MinimalApiVue
{
    public class Program
    {
        public static void Main(string[] args)
        {
            var builder = WebApplication.CreateBuilder(args);

            // Add services to the container.
            builder.Services.AddAuthorization();

            // 加入具有預設原則的 CORS 和中介軟體
            builder.Services.AddCors(options =>
            {
                options.AddDefaultPolicy(
                    policy =>
                    {
                        policy.SetIsOriginAllowed(origin => new Uri(origin).Host == "localhost");
                        policy.AllowAnyHeader();
                        policy.AllowAnyMethod();
                        policy.AllowCredentials();
                    });
            });

            var app = builder.Build();

            // Configure the HTTP request pipeline.

            app.UseAuthorization();

            // 啟用預設 CORS 原則
            app.UseCors();

            // 使用路由表
            app.UseApiRoute();

            app.Run();
        }
    }
}
前端專案修改
新增發送請求按鈕
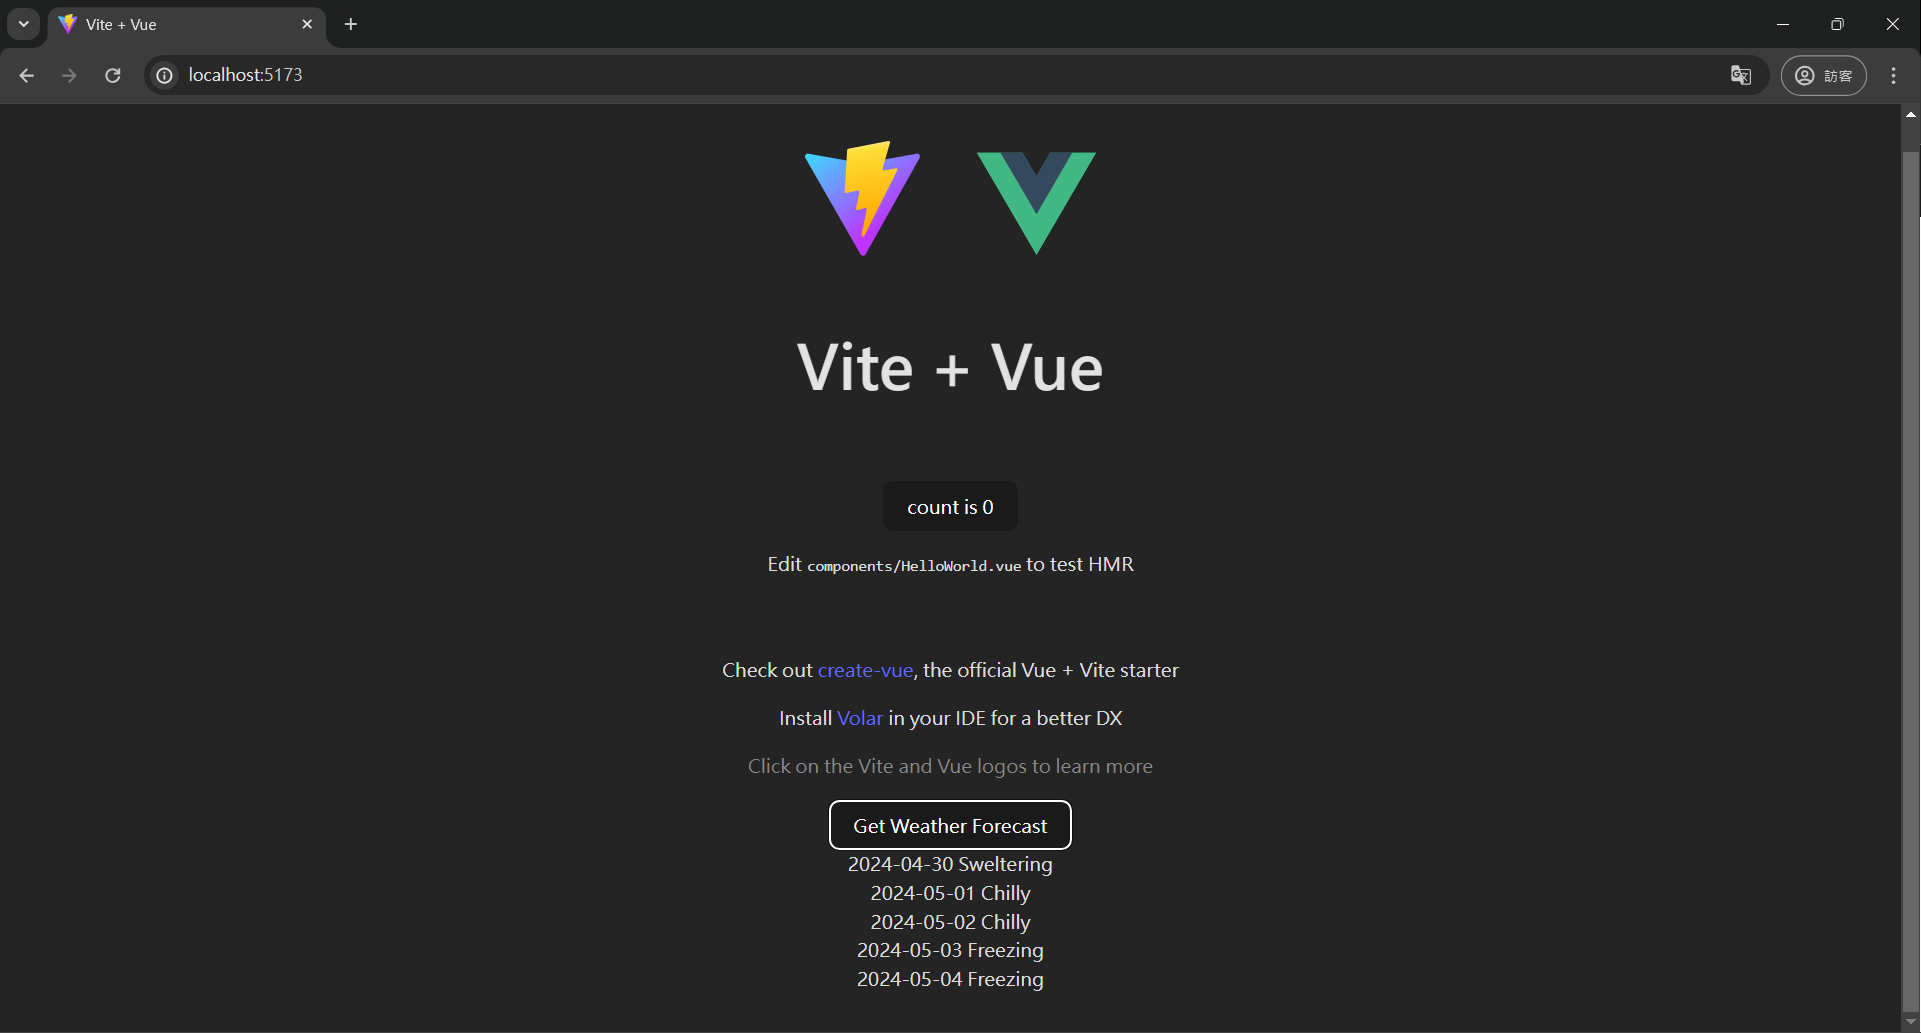
接著是前端專案,這邊新增一個簡單的按鈕來發送請求取得天氣的資料
建立一個 Vue 的 SFC,檔名為 WeatherForecast.vue
程式參考如下
<script setup lang="ts">
import { ref } from "vue";
var weatherForecastDataLsit = ref("");

async function getWeatherForecast() {
  try {
    let response = await fetch("https://localhost:8888/weatherforecast");
    let responseData = await response.json();
    console.log(responseData);
    weatherForecastDataLsit.value = responseData;
  } catch (error) {
    console.error(error);
  }
}
</script>

<template lang="">
  <button type="button" v-on:click="getWeatherForecast">
    Get Weather Forecast
  </button>

  <div v-for="weatherForecastData in weatherForecastDataLsit">
    {{ weatherForecastData.date }}
    {{ weatherForecastData.summary }}
  </div>
</template>
加入到首頁畫面
寫完之後插入到 App.vue
<script setup>
import HelloWorld from './components/HelloWorld.vue'
import WeatherForecast from './components/WeatherForecast.vue'
</script>

<template>
  <div>
    <a href="https://vitejs.dev" target="_blank">
      <img src="/vite.svg" class="logo" alt="Vite logo" />
    </a>
    <a href="https://vuejs.org/" target="_blank">
      <img src="./assets/vue.svg" class="logo vue" alt="Vue logo" />
    </a>
  </div>
  <HelloWorld msg="Vite + Vue" />
  <WeatherForecast />
</template>

<style scoped>
.logo {
  height: 6em;
  padding: 1.5em;
  will-change: filter;
  transition: filter 300ms;
}
.logo:hover {
  filter: drop-shadow(0 0 2em #646cffaa);
}
.logo.vue:hover {
  filter: drop-shadow(0 0 2em #42b883aa);
}
</style>
效果預覽
專案打包發布
確定前端功能可以跑起來,接下來要開始進行專案打包
設定後端的靜態檔案
根據 ASP.NET Core 框架設計 ASP.NET Core 中的靜態檔案 中 wwwroot 為預設的根目錄。
如果要另外設定則可以參考官方文件來修改,這邊先以預設的目錄來建置。
首先是新增一個資料夾命名為 wwwroot,新增後會變成藍色球狀圖示。
接著新增一個空的 index.html 檔案做為測試用。

同時也必須加入下方程式片段
namespace MinimalApiVue
{
    public class Program
    {
        public static void Main(string[] args)
        {
            var builder = WebApplication.CreateBuilder(args);

            // Add services to the container.
            builder.Services.AddAuthorization();

            // 加入具有預設原則的 CORS 和中介軟體
            builder.Services.AddCors(options =>
            {
                options.AddDefaultPolicy(
                    policy =>
                    {
                        policy.SetIsOriginAllowed(origin => new Uri(origin).Host == "localhost");
                        policy.AllowAnyHeader();
                        policy.AllowAnyMethod();
                        policy.AllowCredentials();
                    });
            });

            var app = builder.Build();

            // Configure the HTTP request pipeline.

            app.UseAuthorization();

            // 啟用預設 CORS 原則
            app.UseCors();

            // 使用路由表
            app.UseApiRoute();

            // 提供文件服務
            app.UseFileServer();

            app.Run();
        }
    }
}
啟動偵錯後改變網址會看到剛剛的靜態網頁檔案

相信聰明的大家都知道接下來要怎麼做了
沒錯!就是要把前端專案打包到這個資料夾下
設定前端的打包設定
當執行打包指令 npm run build,預設的打包路徑為專案目錄下的 dist ,
因此我們要先調整打包輸出的路徑
開啟 vite.config.js 或 vite.config.ts vite 的設定檔案,
並新增 build: { outDir: "../MinimalApiVue/wwwroot" }, 設定指定輸出路徑。
import { defineConfig } from "vite";
import vue from "@vitejs/plugin-vue";

// https://vitejs.dev/config/
export default defineConfig({
  build: { outDir: "../MinimalApiVue/wwwroot" },
  plugins: [vue()],
});
執行打包指令後就會成功打包到 Minimal API 專案內的 wwwroot 資料夾,
執行偵錯可以看到是後端的網址,而且能正確拉取到天氣資料,
代表成功把前端的畫面放入後端專案了。

發佈設定
最後就是要發佈成可執行檔案了
設定可參考下圖


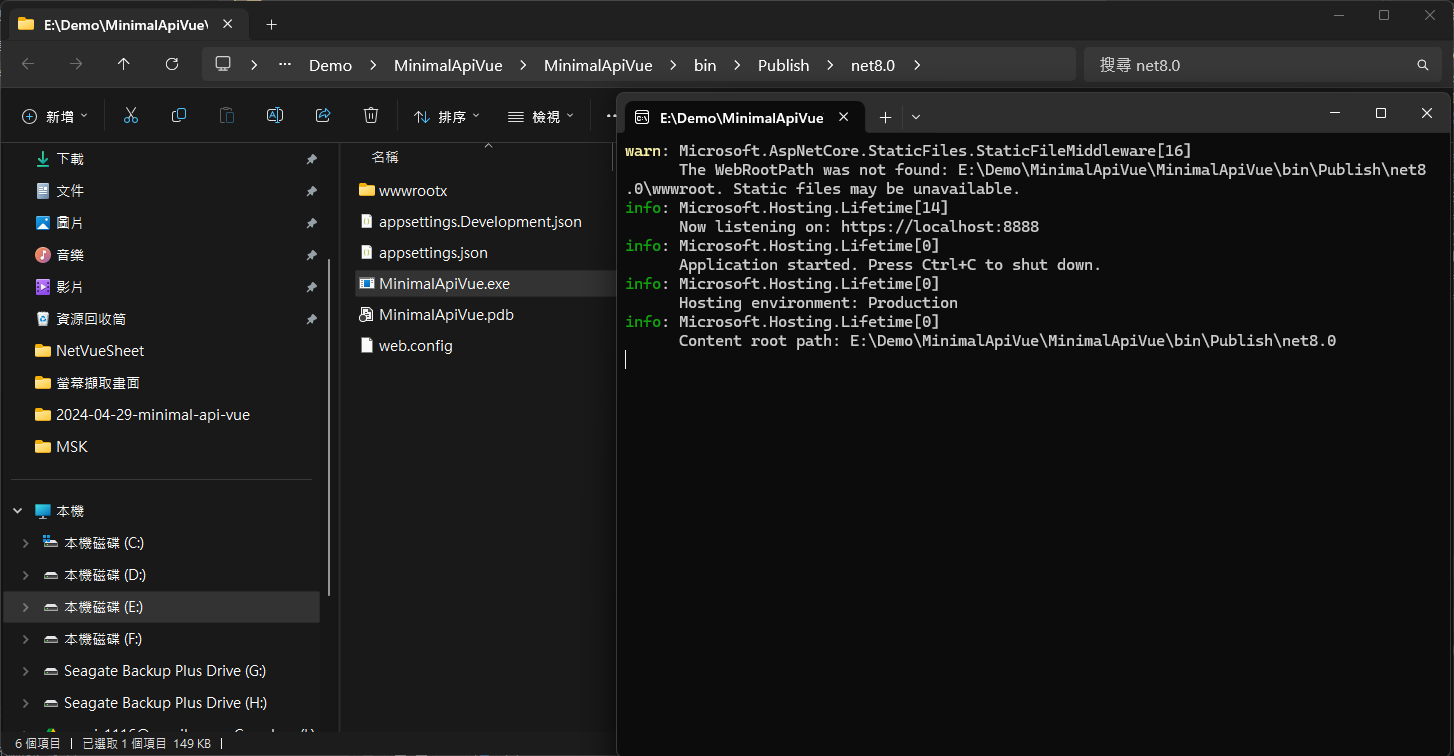
發佈後資料夾長這樣

資源嵌入(可選步驟)
完成上方步驟會看到 wwwroot 和 MinimalApiVue.exe 這兩個檔案,
當今天要交付時由於靜態資源沒有被嵌入到單一檔案內,
所以不能漏掉 wwwroot,否則執行會出現錯誤。
如果希望只要交付 MinimalApiVue.exe 就能執行,
那麼就需要做靜態資源嵌入的設定。
- 首先需要安裝 NuGet 套件
Microsoft.Extensions.FileProviders.Embedded - 將
<GenerateEmbeddedFilesManifest>屬性設為 true。 - 指定要與
<EmbeddedResource>內嵌的檔案
<Project Sdk="Microsoft.NET.Sdk.Web">

  <PropertyGroup>
    <TargetFramework>net8.0</TargetFramework>
    <Nullable>enable</Nullable>
    <ImplicitUsings>enable</ImplicitUsings>
    <GenerateEmbeddedFilesManifest>true</GenerateEmbeddedFilesManifest>
  </PropertyGroup>

  <ItemGroup>
    <PackageReference Include="Microsoft.Extensions.FileProviders.Embedded" Version="8.0.4" />
  </ItemGroup>

  <ItemGroup>
    <EmbeddedResource Include="wwwroot/**" />
  </ItemGroup>
</Project>
接著要調整 Program.cs 中提供文件服務的設定
using Microsoft.Extensions.FileProviders;

namespace MinimalApiVue
{
    public class Program
    {
        public static void Main(string[] args)
        {
            var builder = WebApplication.CreateBuilder(args);

            // Add services to the container.
            builder.Services.AddAuthorization();

            // 加入具有預設原則的 CORS 和中介軟體
            builder.Services.AddCors(options =>
            {
                options.AddDefaultPolicy(
                    policy =>
                    {
                        policy.SetIsOriginAllowed(origin => new Uri(origin).Host == "localhost");
                        policy.AllowAnyHeader();
                        policy.AllowAnyMethod();
                        policy.AllowCredentials();
                    });
            });

            var app = builder.Build();

            // Configure the HTTP request pipeline.

            app.UseAuthorization();

            // 啟用預設 CORS 原則
            app.UseCors();

            // 使用路由表
            app.UseApiRoute();

            // 提供文件服務
            app.UseFileServer(new FileServerOptions
            {
                FileProvider = new ManifestEmbeddedFileProvider(typeof(Program).Assembly, "wwwroot")
            });

            app.Run();
        }
    }
}
完成上面的調整後再執行發佈,
可以看到即使沒有 wwwroot 資料夾也能顯示前端專案畫面,
天氣 API 也能正常取得資料。

結論
雖然 Minimal API 剛出來時引發了一些論戰
很多老屁股沒看到 Controller 就渾身不對勁,
或是沒看到熟悉的 public static void Main(string[] args) 就天崩地裂了。
然而現在的軟體開發方法論越來越多,微軟也借鑑了許多新的框架的優點。
許多人擔心這種把路由表寫一起的狀況會不會變成義大利麵,
但有妥善的架構設計還是能避免的,靈活彈性也意味著要對於架構設計用更多心。
可以看到用 C# 要做一個類桌面應用又多了一個選項,
以往 Winform 畫面不好刻,也無法實現RWD,WPF 要用 XAML 學起來也是不少成本,
專案架構上又容易變成工程師一條龍開發(雖然這些桌面應用也比較偏向是給一條龍專案)。
利用 Minimal API 可以輕鬆嵌入其他前端框架,
或是想復古用 jQuery 硬幹都可以,
讓切板與前端專業的人可以發揮專長進行協作。
最後使用資源嵌入還能實現單檔部署,檔案交付更方便了。
參考資料
ASP.NET Core 極簡風 - Minimal API
ASP.NET Core 極簡風 - 嵌入 .html/.css/.js 靜態檔案徹底實現單檔部署
ASP.NET Core 中的靜態檔案
ASP.NET Core 中的檔案提供者